How to Use MIDI Transformations in Ableton Live
Ableton Live 12 MIDI Transformations reshape notes that are already present in a MIDI clip. They can tighten timing, change articulation, connect a phrase, alter chord timing, or rearrange note properties while keeping the work in the MIDI Note Editor. Start with a MIDI clip containing notes and select the notes or time range you intend to change. Ableton’s MIDI Tools documentation describes the current transformation tools and their behavior.
Video walkthrough
Open the Transform panel and choose a target
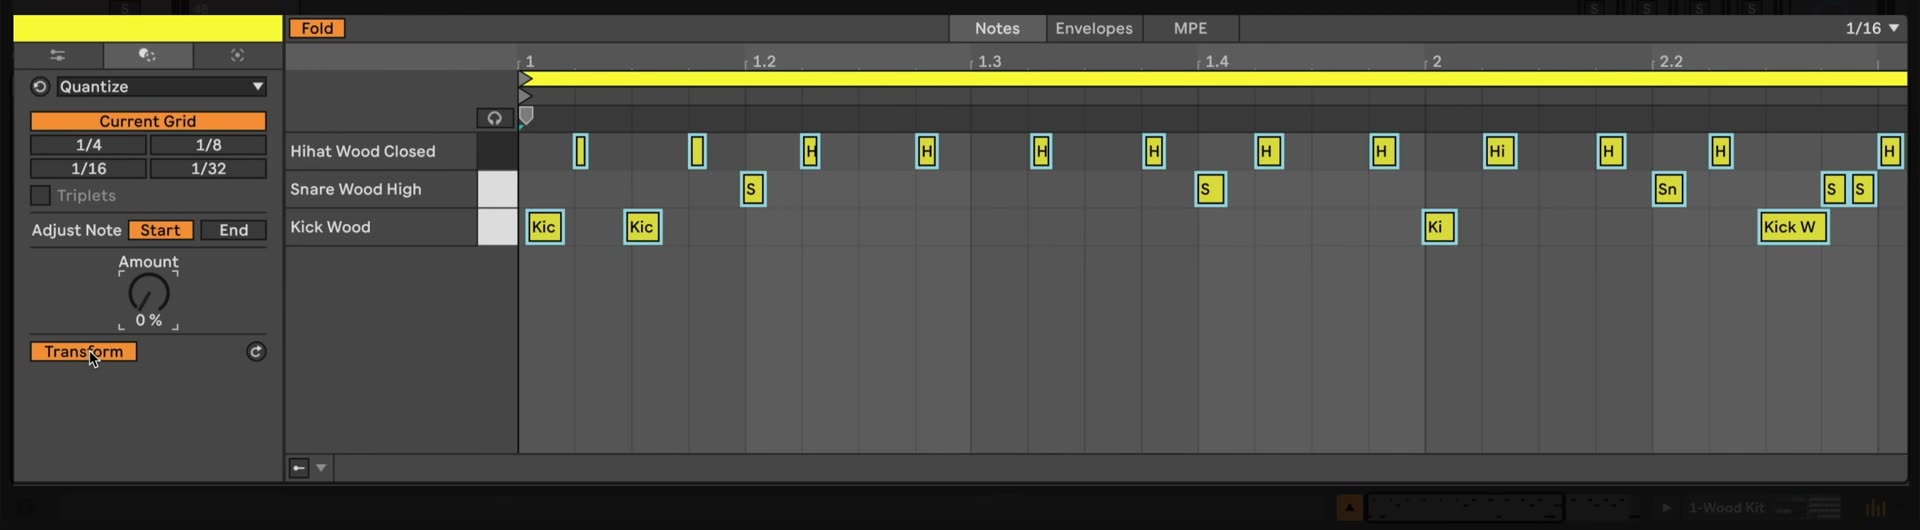
Double-click the MIDI clip to open Clip View, select the Notes tab, then open the Transform panel. Choose a tool from the Transformation Selector. Transformations use existing MIDI notes as input: they affect a note selection, a time selection, or the clip loop when neither selection is active. The original notes in that target are replaced by the transformed notes.
Choose the target before selecting a transformation. For example, select only a hi-hat row before adding ornaments, a short passage before changing its timing, or the entire loop before rearranging a pattern. This makes it easier to test an idea without changing the rest of the clip.
Preview changes or apply them manually
Auto Apply is active by default in a MIDI Transformation. While it is on, moving a parameter updates the result immediately in the MIDI Note Editor. This is useful for listening to a timing, articulation, or pattern change as it develops.
Turn off Auto Apply when you want to configure a tool before changing the notes. Live restores the original notes when the control is turned off. Then press Apply to commit the current settings, or press Ctrl+Enter on Windows or Cmd+Enter on macOS. Standard Undo and Redo commands can reverse or restore resulting MIDI notes; the tool’s Reset control only restores that tool’s parameters.
Match the transformation to the musical task
The Transformation Selector contains tools for different kinds of edits. This compact guide can help identify a useful starting point.
| Goal | Transformation | Useful starting controls |
|---|---|---|
| Tighten or reshape timing | Quantize, Chop, Time Warp | Grid value and Amount; note divisions; speed curve |
| Fill or develop a melodic line | Connect, Arpeggiate | Density, Rate, Tie; Style, Distance, Steps |
| Change note articulation | Ornament, Span, Strum | Flam/Grace Notes; legato/tenuto/staccato; strum offsets and tension |
| Rearrange an existing idea | Recombine | Position, pitch, duration, or velocity; Shuffle, Mirror, or Rotate |
| Add MPE expression | Glissando, LFO | Pitch bend curve; pitch bend, slide, or pressure modulation |
Use one transformation at a time when learning the tools. Each result remains editable MIDI, so you can follow a broad transformation with smaller manual corrections or another focused transformation.
Tighten, divide, or stretch timing
Use Quantize to move note starts, ends, or both toward the current grid or a chosen rhythmic value. Its Amount control allows partial quantization, which can retain some of the original timing. This makes it suitable for correcting an uneven performance without making it completely rigid.
Chop divides selected notes into parts according to its division pattern. It can create quick rhythmic subdivisions from sustained notes or introduce intentional gaps and variations.
Use Time Warp when a selection needs a gradual change in note spacing, such as an accelerando or ritardando. Shape its speed curve in the display, then enable Quantize if the result should align to the grid. Preserve Time Range keeps the transformed result within the original selected span; Include Note End makes original note endings part of the calculation.
Add movement and articulation to notes
Connect fills the gaps between existing notes with interpolated notes. Set Rate for the new notes’ length, Density for how much empty space is filled, Spread for their pitch variation, and Tie when notes should extend into one another. It is useful for turning sparse melody or chord material into a more active line.
Ornament adds detail at the beginning of selected notes. Flam adds one extra note, while Grace Notes adds several. Their position controls decide whether the ornament precedes or replaces the start of the original note; velocity and pitch settings determine how the embellishment relates to it.
For note lengths, Span offers legato, tenuto, and staccato articulation types. Use Offset to lengthen or shorten notes and Variation for randomized length changes. For chords, Strum offsets individual note starts with low and high strum controls; Tension curves the spacing between those notes rather than leaving it even.
Rework patterns with arpeggiation and recombination
Arpeggiate redistributes selected notes into a pattern. Choose a Style, then use Distance and Steps to set the transposition pattern, while Rate and Gate control the timing and duration of the new notes. When a clip scale is enabled, pitch-related controls use scale degrees instead of semitones.
Recombine rearranges the position, pitch, duration, or velocity values among the selected notes. Choose the property to reorganize, then use Shuffle for a random permutation, Mirror to reverse the value order, or Rotate to move values through the selection. It can produce variations while retaining a familiar outline; for example, leave note positions in place while recombining pitches or velocities.
Use MPE and Max for Live transformations when appropriate
Glissando and LFO are MPE MIDI Transformations. Glissando adds pitch-bend curves between successive notes, while LFO can apply a shaped modulation to pitch bend, slide, or pressure. View their resulting expression data in the MIDI Note Editor’s MPE view mode or its corresponding expression lanes.
Velocity Shaper is a Max for Live transformation included with Live Standard and Suite. It uses an adjustable envelope to set selected-note velocities. Live Suite, or Live Standard with the Max for Live add-on, can also use compatible third-party Max for Live MIDI Tools saved in the User Library or a folder available through Places.
Refine the result in context
Audition each transformation with the other clips in the Set. If a result changes too much, undo it and reduce the scope, adjust the amount, or use a smaller time selection. Keep a duplicate clip when comparing contrasting rhythmic or harmonic variations.
Transformations are most effective as deliberate edits to existing material: use Quantize to control a performance, Ornament or Span to shape articulation, Time Warp or Strum to change motion, and Recombine or Arpeggiate to make structured variations. The generated result remains ordinary MIDI that can be edited note by note.